When to Start a Beehive
So you’re ready to start your first hive! Congratulations! There’s a world of wonder awaiting you! And also a decent amount of planning. Starting a hive isn’t the work of a weekend, and it can’t be started just any time of the year. But don’t be daunted! As long as you have a sense of what to do when, the work is really pretty minimal.
The time to install your hive is spring. If you’re brave enough to try to catch a wild swarm, spring is when you’re most likely to find them – it’s when the population growth is booming and things get cramped enough in existent hives for swarms to break off. Odds are you’re ordering a package colony from a company, though, and spring is when they do their business.
No matter when you order, your package colony will most likely be delivered in April. That’s the time established colonies start getting to work, and the perfect time to start. It should be warm enough for the bees to be active, and nectar and pollen flow should be at its highest. Conditions are perfect for rapid growth.
That being said, you shouldn’t wait until April to order. Package colonies are in high demand – even established beekeepers who’ve lost their bees to winter will be after them – and you don’t want to invest in a lot of equipment only to find there’s not a bee to be bought in your area! As early as January, start shopping around. Compare your options and pre-order if you can.
Although your bees won’t be coming until the spring, there’s no reason to wait until then to start planning. In fact, you shouldn’t wait. Setting up a hive involves quite a bit of waiting and assembling and just plain figuring things out. And bees are living things: As soon as they arrive, they need a place to live. You wouldn’t wait until you’ve brought your baby home from the hospital to start thinking about buying a crib.
The best time to start planning and amassing equipment is the fall. It’s still nice enough that you can explore outside for the perfect location, and you have plenty of time to read up and track down the right equipment. The last thing you want is to rush to the beekeeping supply store at the last minute only to find they’re sold out of what you’re looking for.
Check the Laws
Another thing you’ll want to do ahead of time is to research the government regulations on beekeeping where you live. In the United States the federal government has no beekeeping regulations (apart from some restrictions on importing honey bees from abroad). Instead, the rules are left to the state governments, which unfortunately means some research on the part of the beekeeper.
This directory of US State Departments of Agriculture is a good place to start. For example, if I want to know if I need to register in the state of Washington, I’ll follow that state’s link to the Washington State Department of Agriculture site. Rather than sifting through, trying to decide if bees fall under insects or animals, I’ll type “apiary” into the search bar at the top. (Apiary is a scientific term and more likely to bring up what you’re looking for than “beekeeping”). Sure enough, this search brings up the result Apiary Registration, which has instructions, cost, timeline, and a link to the form.
If you find your state’s website confusing (and they sometimes are) call the office instead and speak to a real person who ought to know the rules. Alternatively, call or visit your local university extension office – they’ll know what needs to be done. They’ll also know if you’ll need to have your hive inspected for disease once it’s up and running.
Similarly, you’ll need to check with your local government to make sure beekeeping is allowed. It’s important to remember that bees can be dangerous and even deadly for some people, and cities and towns are well within their rights to forbid the keeping of bees within their borders. If this is the case for you, though, don’t despair! Do you have friends or family with land outside the city limits? What about farmers? A dedicated pollinating team is a huge incentive for a farmer to let you keep a hive or two on their farm. And the promise of a jar or two of honey will only sweeten the deal. Ask around – you may be pleasantly surprised.
Even if beekeeping is allowed where you live, it’s common courtesy to tell your neighbors about it, especially if you live in close quarters. Tell them that bees don’t sting unless threatened, and as the hive will be on your property that shouldn’t be a problem. Again, the promise of honey can go a long way. Know when to back down, though, like in the case of a severe bee allergy. As discussed above, there are other options, and you don’t want a feud on your hands!
Find a Mentor
While you can get by perfectly fine doing your own research, sometimes having a mentor can be invaluable. A mentor can mean a lot of things, from someone who’s willing to let you observe them in their own hive for a year to someone who’s just willing to answer the phone if you have a problem you can’t quite figure out on your own. It all depends upon what you’re looking for and, of course, what your resources are.
 There are more beekeepers around than you may think! If you’re looking for a mentor, or just someone to talk shop with, start asking around. Call your local extension – they may even have classes. Ask around town – someone may have an aunt or a friend of a friend who keeps bees and would love to gush.
For a more streamlined approach, check out the Apiary Inspectors of America. They have a directory for each US state and Canadian province that will guide you to government and university experts, as well as the state’s beekeeping association. These are also excellent resources for making sure your hive’s registration and inspection are up to snuff.
How Many Hives?
Often when you take on a new hobby, it’s good to start small. It’s the same case for beekeeping, isn’t it? Not necessarily…
Honey bees are living things, and while we do our best to care for and understand them, sometimes we fall a little short. Sometimes they die. Sometimes they leave. Sometimes this happens even if we do everything right. The problem is that if this happens to your one and only colony, you’re flat out of luck. Packaged bees are very hard to come by outside of spring, and even if you do find some, their chance of building up enough reserves to survive the winter are slimmer. If you lose your only colony you will, most likely, be waiting for the spring to give it another go.
If you have two or three colonies to start with, however, the loss of one goes from a devastating blow to just a sad setback and, possibly, a learning experience. You’ll still be able to see the season through, and you’ll still get honey. Just not as much.
Another good reason to start with more than one hive is comparison. If you’d never owned a dog before, and your brand new dog started meowing, would you know something was odd? Get two dogs, however, and chances are they both won’t be meowing, and you’ll probably get the sense that something is amiss.
It’s the same with bees, except they’re a lot less familiar than dogs. With only one colony, it’s going to be a lot harder to determine which behavior is a warning sign and which is bee business as usual. If you have two or more colonies, though, you’ll have direct samples to compare. It’s not foolproof, of course – an environmental problem or disease could affect all of your hives at once – but it’s a big step in the right direction.

You may be hesitant to start more than one hive, but most of the reasons that come up are not nearly the problem you might think. A common worry is that with multiple hives, there won’t be enough food to go around. In reality, bees will travel miles to collect nectar and pollen, and the likelihood that there aren’t enough flowers within that radius of your hives is very low. Your single colony would probably already be competing with faraway bees you don’t even know about.
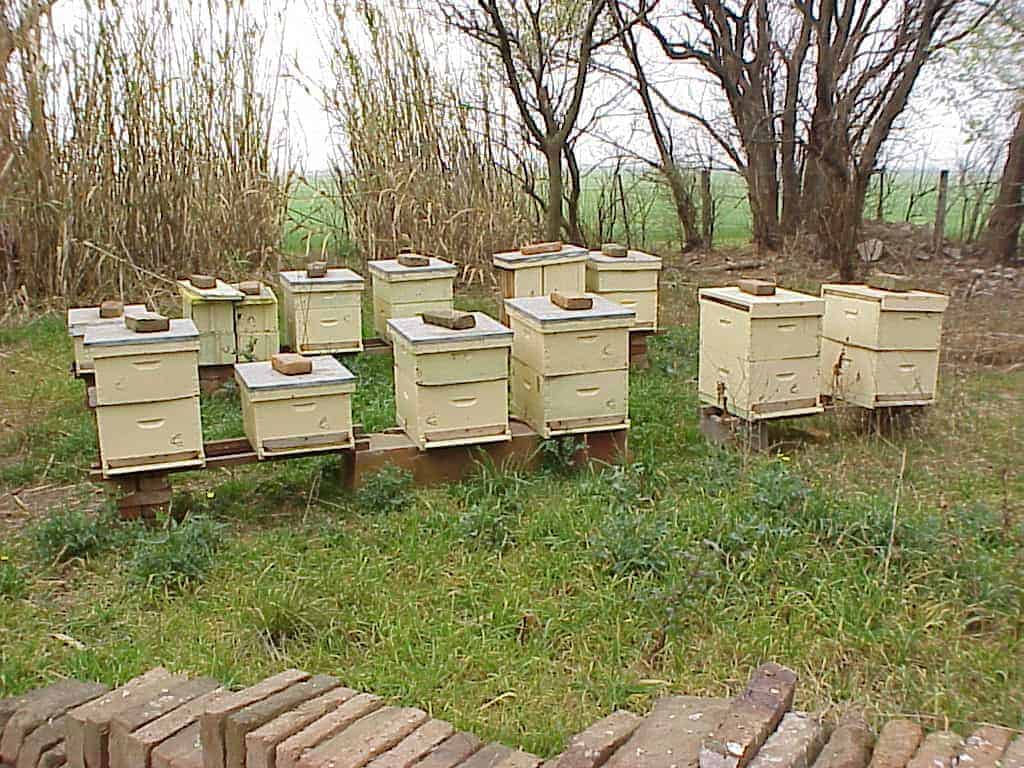
Bees really don’t mind having close neighbors – they can smell which hive is theirs and won’t get confused, and as long as you leave six to eight inches of space between hives, they’ll be perfectly happy and you’ll hardly lose any more space in your yard.
Time is another concern, but once you’ve gotten all your equipment together and actually made your way to the hives, the time it takes to check on one more isn’t going to be much. The longer you have a hive open, the angrier the bees get, and you really shouldn’t be in there for more than fifteen minutes at a time.
So why would anyone have only one hive? It all comes down, unfortunately, to cost. Each new hive is going to run at least $150, which is a lot of money to add on top of an already expensive startup price.
Basically, if you can afford to start two or even three hives, you should. The benefits are definitely there. If you can’t or simply aren’t willing to spend the extra money, though, there’s nothing that says you can’t have a single hive, or that that hive won’t be successful. Do what works for you.
Which Style of Hive is Right for You?
In the last article we talked about three main types of hive: Langstroth, Warre, and Top Bar. Each one has its own merits and drawbacks, and it’s ultimately up to you to decide which is the best fit. For the beginner, however, Langstroth is probably a good option.
Is it easier? Not necessarily. Especially if you have trouble lifting heavy things, Top Bar is a better choice. Langstroth is the most popular, though, and if you’re just starting out that can be a real advantage. You’re much more likely to find a mentor for a Langstroth hive. You’re much more likely to find readily available equipment. You’re also going to find a lot more written material, like right here. Soon we’ll have articles devoted to Warre and Top Bar hives, but since Langstroth is the first for so many, this is what we’ll focus on for now, with a few nods to Warre and Top Bar.
Starter Kits vs. Individual Components
As you may have noticed in our last article, there’s quite a lot of equipment involved in getting a beehive going. It is, there’s no denying it, an expensive start. It’s very good to keep in mind, however, that almost everything you have to buy this first time will last virtually forever.
The first year demands that you buy everything. The second year demands new foundation for your frames (if you’re even using foundation), a new queen if your old one gets lackluster, and treatment for parasites and disease. According to Illinois State University, the annual expense of a healthy beehive over a seven year period is $80-85. That’s including that big pile of money at the beginning. Essentially, there will always be some costs, but if you play your cards right and get lucky, the costs will be small, and you’ll never again have to pay as much as you did that first day you ordered all your new stuff.
Some beekeepers save money by buying used equipment. This is a possibility, but you have to be extremely careful. Beehives can get infested with all kinds of diseases and pests that travel with the equipment. You never want a sick hive, and you especially don’t want to start with one if it can be prevented. If you’re going to buy used equipment, insist that the seller show you certification that it’s been inspected by the state very recently.
Some other beekeepers save money by building their own equipment. This is also a possibility, but also requires you to be very careful. Disease may not be a problem, but dimensions are. Bees need something called “bee space” – a distance of about a centimeter between frames – that discourages them from fusing the frames together and making them impossible to remove without destroying the comb. Ensuring that you have the right bee space requires careful planning and measurement and a decent amount of carpentry skill. It also requires a decent amount of lumber, and the costs in the end may not be that much lower than those of a store bought hive.
The bottom line is that if you’re a beginner, the best route to take is to buy your equipment from a beekeeping supplier. This way you know the parts will fit together and be free of disease. Take a look at a beekeeping supply site, though – there are a whole lot of pieces, aren’t there? You can, if you want, buy every component by itself. But there’s no real reason to, when so many starter kits are available.
Beekeeping starter kits are a great option because they work out to be cheaper than each piece bought individually. They’re also guaranteed to have compatible parts. Langstroth hives tend to hold either eight or ten frames. Both are fine on their own, but if you buy one eight-frame super and one ten-frame super, you’re in serious trouble. A kit saves you from the sinking realization, when you open up the box, that you’ve missed something important.
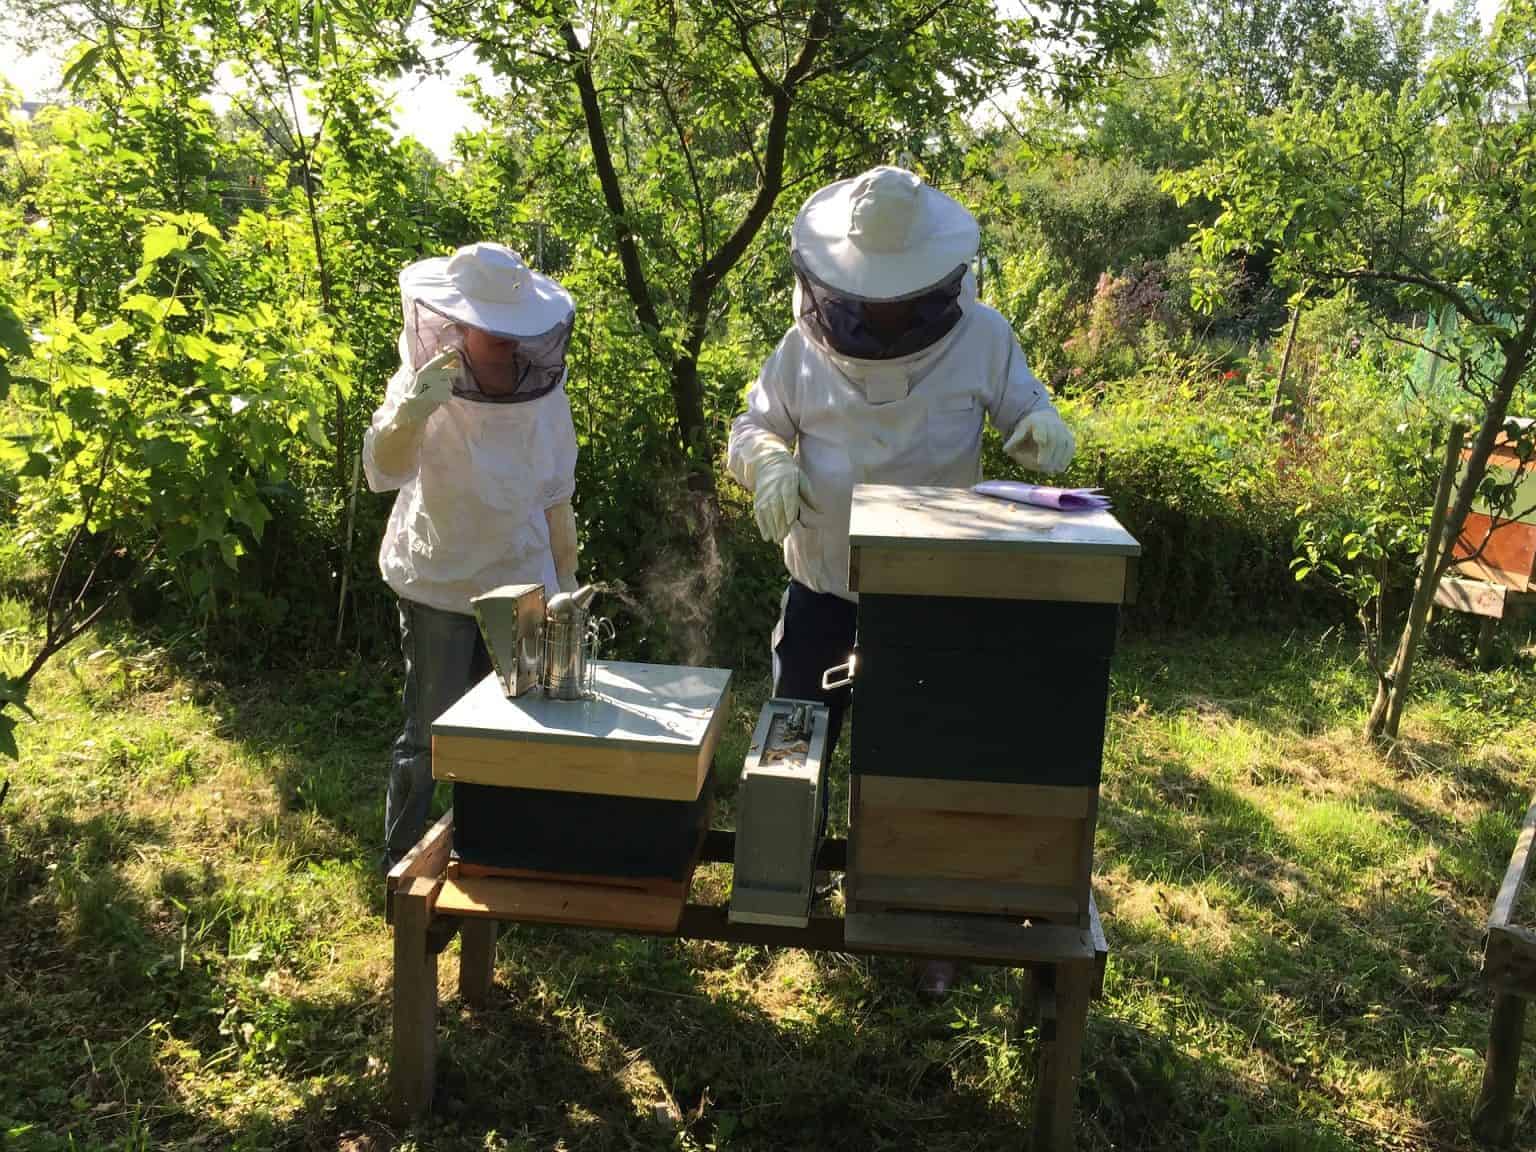
Kits tend to come with tools (like a smoker and hive tool), clothing (like gloves and a veil), a book. The hive itself may be sold separately to offer you flexibility or part of the overall kit. The price can range from $99-$500. What do you get for that extra money? More supers, for one thing. The most basic kits come with only one hive body, where your bees will do all their living and storing. It will get you started, but you can’t really harvest honey from it. Granted, some colonies don’t produce enough extra honey to harvest in the first year anyway, so if you’re willing to be patient a single brood box is fine to start with… as long as your winters aren’t too harsh.
Bees need to store honey to survive the winter, and the longer and colder it is the more honey they’ll need. If your winters tend to be bad, you should buy a kit with two deep supers that can be used as brood boxes. If you want to try collecting honey in your first year, you should buy a kit that also has a medium super for honey. Kits with both of these start at around $300.
Assembled Hives vs. Unassembled
Another thing you’ll notice as you wade through all the possible equipment is that hives tend to be split into two categories: assembled and unassembled. It’s just what it sounds like – you can choose to have your hive delivered in pieces or, for a higher price, all put together. This choice has no bearing on the bees or the final hive product – it’s just down to your commitment and skill with a hammer.
Assembling a hive isn’t rocket science, but it does have to be done right. It’s a nice time to have a mentor who’s done it before and can assure you that all those parts really do fit together. The next article has in depth instructions on how to put together an unassembled hive to help guide you through.
In the end, it’s up to you. Buying an unassembled kit is a good way to save some money and get more involved in the process. On the other hand, buying an assembled kit assures you, for just a little extra money, that your hive is put together correctly.
Foundation
There’s one more dilemma to face when picking out your equipment: which type of foundation to use. Foundation is the thin sheet of stuff that fits in the frames. The bees will cover it with wax and then draw the wax out into the hexagonal cells of their comb. It is, literally, the foundation of their home. There are three main routes you can take with foundation, and each has its strong supporters.

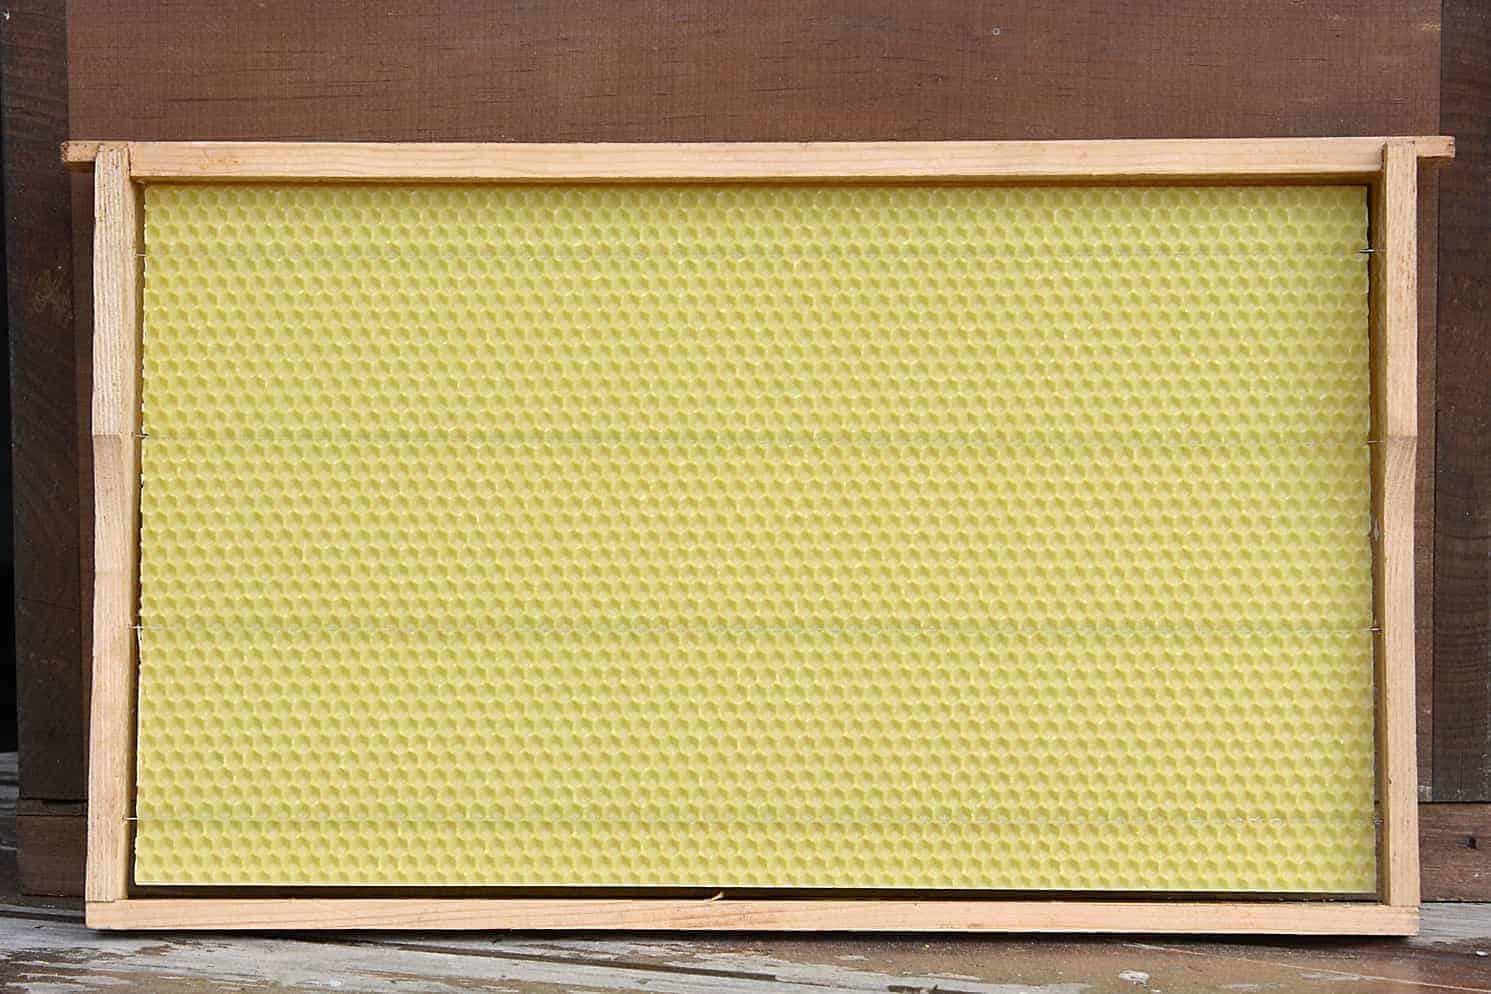
The first is beeswax in a wooden frame. The beeswax comes in a thin, flat sheet that’s been stamped on both sides with a hexagonal pattern. The bees will follow this pattern to make nice, uniform hexagonal cells. Beeswax foundation comes in thick and thin varieties. The thick beeswax foundation has crimped wire embedded in it for extra support, and should be used in the hive body for brood production and in your honey super if you’re going to extract the honey.
The wire supports end in hooks that help fix the foundation to the frame. The thin foundation, also called surplus foundation, has no wires and should be used in your honey super if you’re planning on eating or selling honey with the comb included, often called cut comb honey. If you’re looking for cut comb honey, wax is a necessity. Even if you’re not, a lot of beekeepers prefer beeswax foundation because it’s more natural.
The next type of foundation is plastic in a wooden frame. This thin sheet of plastic has a stamped pattern just like the beeswax foundation. It has no wires or hooks, and simply snaps into place in the frame. It’s coated in a thin layer of wax to keep the bees happy. Plastic is obviously more durable than beeswax and won’t have to be replaced for years. It’s also much easier to install.
Another foundation option is all plastic. It’s similar to the plastic above, except in this version the foundation and the frame are combined into a single piece of moulded plastic coated in beeswax. This version is even more durable and requires no installation at all.
There is one more option, and that’s to avoid foundation altogether. Both the Warre and Top Bar hives are foundationless, and some Langstroth hive owners swear by it as well. Bees in the wild don’t start out with any foundation, and some beekeepers like to keep their hive environment as natural as possible.
Foundation does force the bees to build a fixed cell size that is smaller than the size required for drone brood, resulting in about a quarter of the drone production of what you see in the wild. Since drones aren’t necessary to the health of a colony, most beekeepers see this as a fine sacrifice, though some believe it’s resulting in a long term weakening of the honey bee gene pool.
If you want to try going foundationless, just pour a little beeswax in the top and bottom grooves of your empty frames to give the bees something to work with, and put the frames in your hive. Bear in mind that since the bees are starting from scratch, it’s going to take them longer to get going than if you give them foundation.
This is another case of plenty of options and none of them wrong. If you speak to a beekeeper, they’re sure to have a favorite, and maybe a strong opinion about it to boot. Really it’s up to you and the balance you want to strike between nature and ease. Is plastic “natural?” Not really. But neither is beekeeping.

